From this

to this

I had to go through 8 stages:
1) Designing the print
- I was given a template to draw on. It is important to draw within a frame - the frame is used as a reference point for printing later, so all the blocks will align properly.
- As a beginner, I think it is best to keep your design simple, otherwise you get frustrated easily in executing the design.
- The most challenging part is to learn how to visualise the printing of your design. You have to plan how many blocks you need to create the final print. To decide on what objects to put on a block, you have to think about which objects are lighter or darker, in the front or at the back, can overlay with others or must be a standalone, etc.

Design on tracing paper
2) Transferring the image to the block
- A printing block works like a photo film or a mould, it should be the negative version of the original print. Therefore, it is important to remember to flip over the tracing paper and copy the reverse image onto the block.
- If you watch David Bull's video (see references), you will see that he photocopy his design onto a thin piece of paper, brush water on the paper, and then rub off the ink onto the block.
- Laura taught the class to use carbon paper for tracing; it is cheap, easy and does the job well. However, if you are looking for absolute precision and consistency, photocopying is still the way to go.

Design transferred to block using carbon paper
3) Cutting the Kento
- Kento is the registration mark that you make on the block, it should be consistent from block to block so your printing will align well. It also serves as a slot for your paper to rest on and not move around during printing.
- In the picture below, you can see the Kento on the bottom left and right corners.

Kento slots
4) Cutting the block
- This is the part that requires both mental and physical strength. To prevent mistake, it is good practice to mark on the block which areas to keep/cut so you don't get confused. Any major mistake may render the block useless, unless you redesign to accommodate the mistake or try to pass it off as creative expression :)
- Start with cutting the outline, then slowly chip away the wood around the print area, creating a "moat" that is roughly the width of two fingers. The "moat" provides a space for excess paint to flow to, and also prevents you from painting nearby objects.
- In the picture below, the "floating" mountain, river and stones are the print areas, while the "moats" are the areas that had been chipped away.

A cut block with "islands" and "moats"
5) Preparing the paper
- For Japanese woodblock printing, the type of paper you use will give you different results depending on how well the paper absorbs the paint. In class, I got to experiment with Washi paper and Fabriano paper.
- It is important to always print on damp paper, and the paper needs to be kept damp throughout the printing process. Once a paper dries out, it will shrink and become uneven; if you try to apply additional paint afterwards, the shapes won't align well and the colour will be uneven too.
- Laura taught us how to prepare the damp papers and keep them between wet newspapers to maintain the moisture. She also taught us about "sizing paper" - treating papers with chemical products to enhance the colour absorbance of the paper.
6) Application of paint
- The paint used is a mix of watercolour paint and nori paste (glue made of rice flour, 浆糊).
- Before applying the paint, I had to wet the woodblock with water, wipe off excess water, then only apply the paint. The difficult part is to know how much paint and nori paste to mix together to get the right viscosity that will give a nice colour and consistency.
- To apply the paint, I first dabbed a few drops of watercolour paint and nori paste on the block, then used a printing brush (see below) in gentle circular motion to "massage" the paint into the wood.
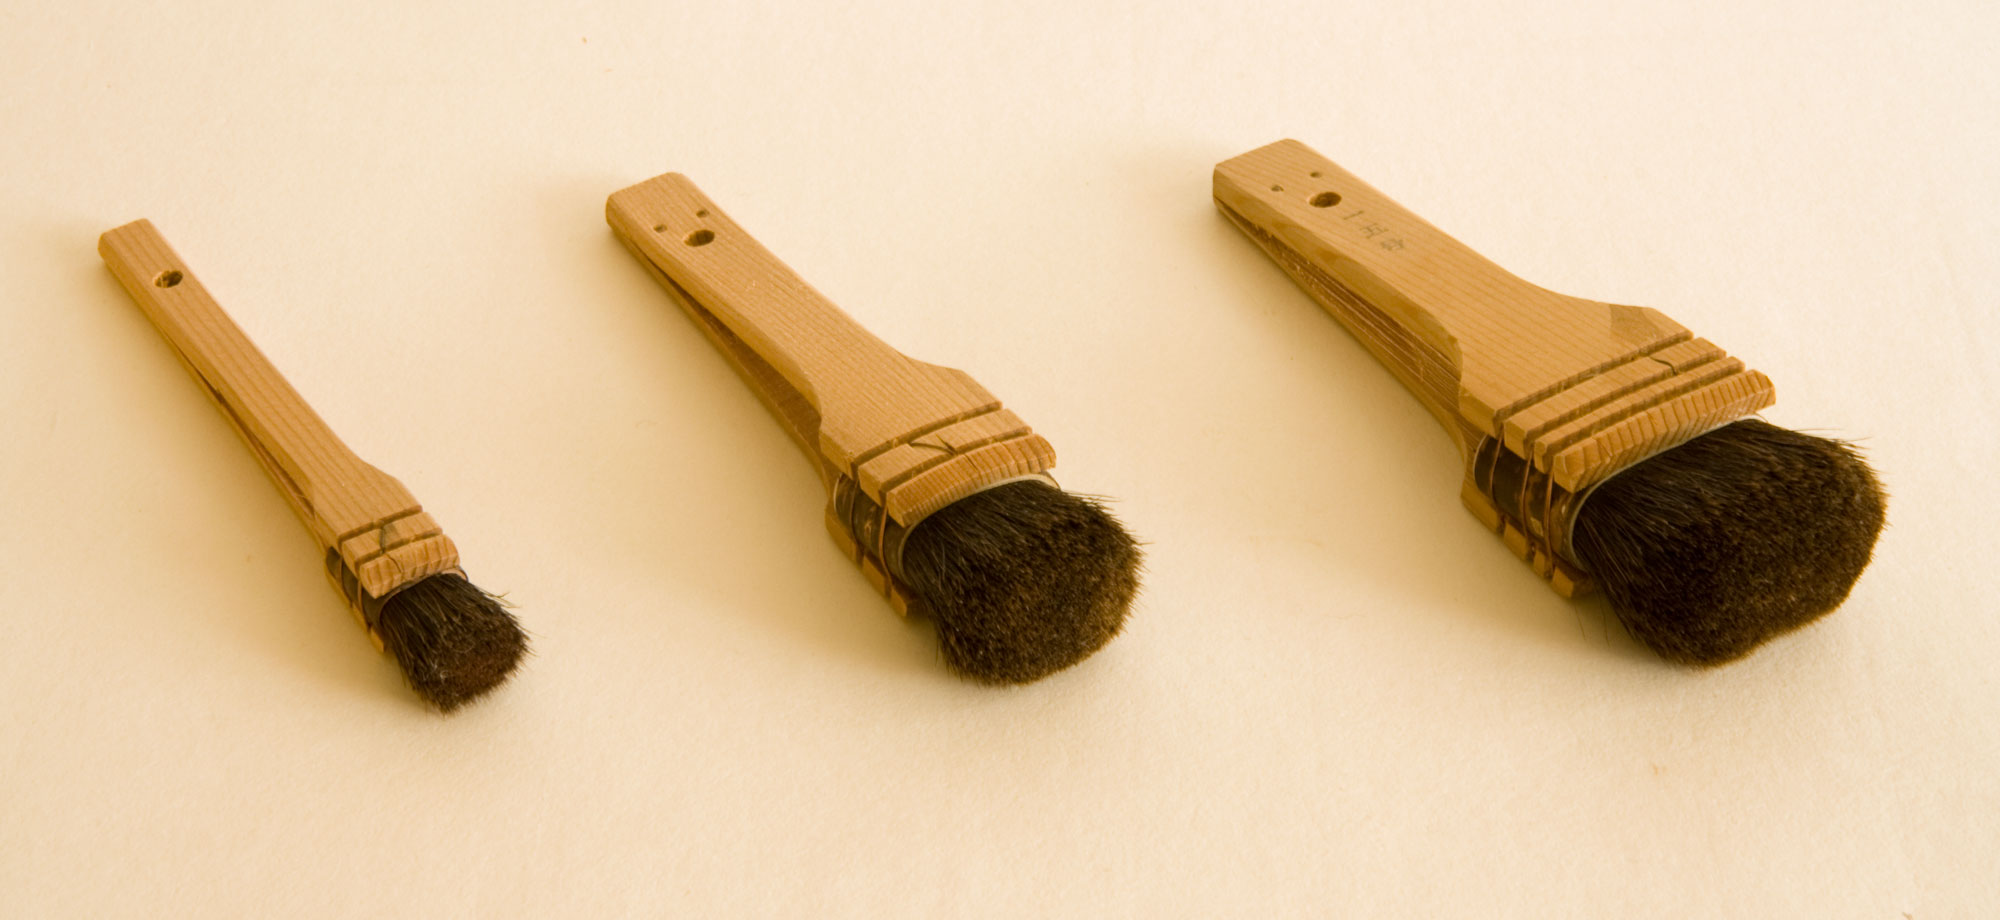
Printing brushes
source: https://jacquesc.home.xs4all.nl/Printing.htm
7) Printing
- For printing, line up the bottom edge of the paper to the two Kento slots. Then, use a baren (see below) to gently rub the back of the paper so the paint will create an impression on the paper.
- Gently remove the paper and return it to the wet newspapers to keep it damp. Repeat paint application and printing steps until you reach a satisfactory result.
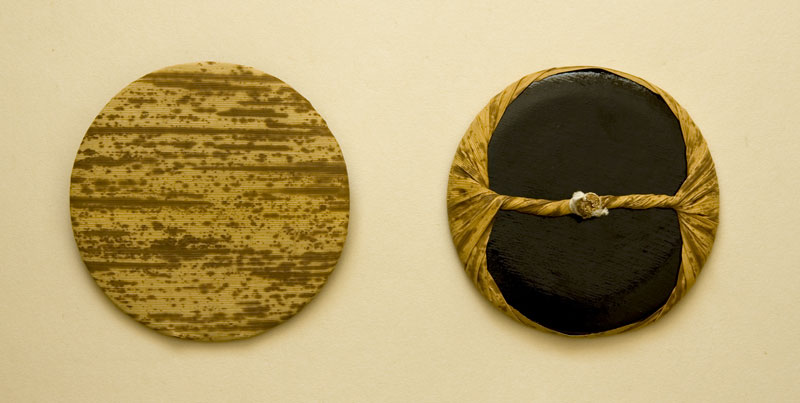
Baren
source: https://jacquesc.home.xs4all.nl/ToolsAndMaterials/HonBaren.jpg

This is how the block looks like after multiple times of paint application and printing

One of the better proof copies I did - the paint was still kind of patchy,
and some lines were running into places where they shouldn't be
8) Drying
- Laura advised us to keep the final print damp between sheets of newspapers, press it flat using heavy books and leave it for at least 24 hours. After that, remove the print and leave it for a day to dry completely.
- I did not follow through this step properly, and as you can see, my final print (see below) ended up somewhat uneven and curled because I didn't press it flat while it was damp. I tried to iron the paper between a piece of cloth and it did help a little.

Final print on Fabriano paper
Final print on Washi paper - the colour turned out to be lighter than the Fabriano paper
References
If you really want to learn about the art, I suggest you check out the following resources for inspiration, or even better, go sign up for printmaking lessons!- David Bull's youtube videos (https://www.youtube.com/user/seseragistudio/featured) and website (http://www.woodblock.com/encyclopedia/outline.html)
- Laura Boswell's website (http://www.lauraboswell.co.uk/resource.php)
No comments:
Post a Comment